For Organization Admins Only
This process is completed by organization admins to manage legacy protocols after migrating to Vetspire.
A protocol is a predefined set of actions or reminders related to patient care. Protocols are mapped to products within Vetspire to ensure that specific procedures or treatments are consistently followed, such as immunization schedules and annual exams.
When you migrate to Vetspire from another practice management system, protocol reminders from the previous system can be mapped to your products and protocols in Vetspire.
This enables legacy reminders to trigger corresponding patient protocols in Vetspire. Additionally, legacy reminders will display in the right panel of Patient Chart under Patient Reminders after the mapping is complete:
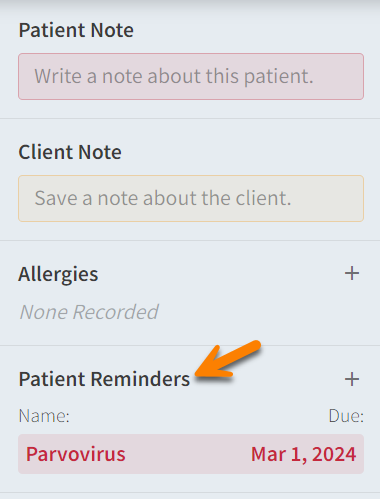
All legacy protocol reminders display in Patient Chart > Immunizations.
Because protocols are most often related to immunizations, all types of legacy reminders display in the Immunizations tab of Patient Chart. This includes protocols that are not specifically related to immunizations, such as annual exams.
Before You Get Started
You will need your Protocol IDs to add to the Protocols Migrator CSV file.
To obtain a Protocol ID, go to More > Marketing & Reminders > Reminder Protocols. Select a protocol that you will use to map a legacy protocol reminder. The Protocol ID is the number that displays at the end of the URL in your browser navigation bar.
Example: HTTPS://YOUR_ORG.VETSPIRE.COM/MARKETING/PROTOCOLS/123. In this case, the Protocol ID is 123.
How to Map Legacy Reminder to Vetspire Protocols
-
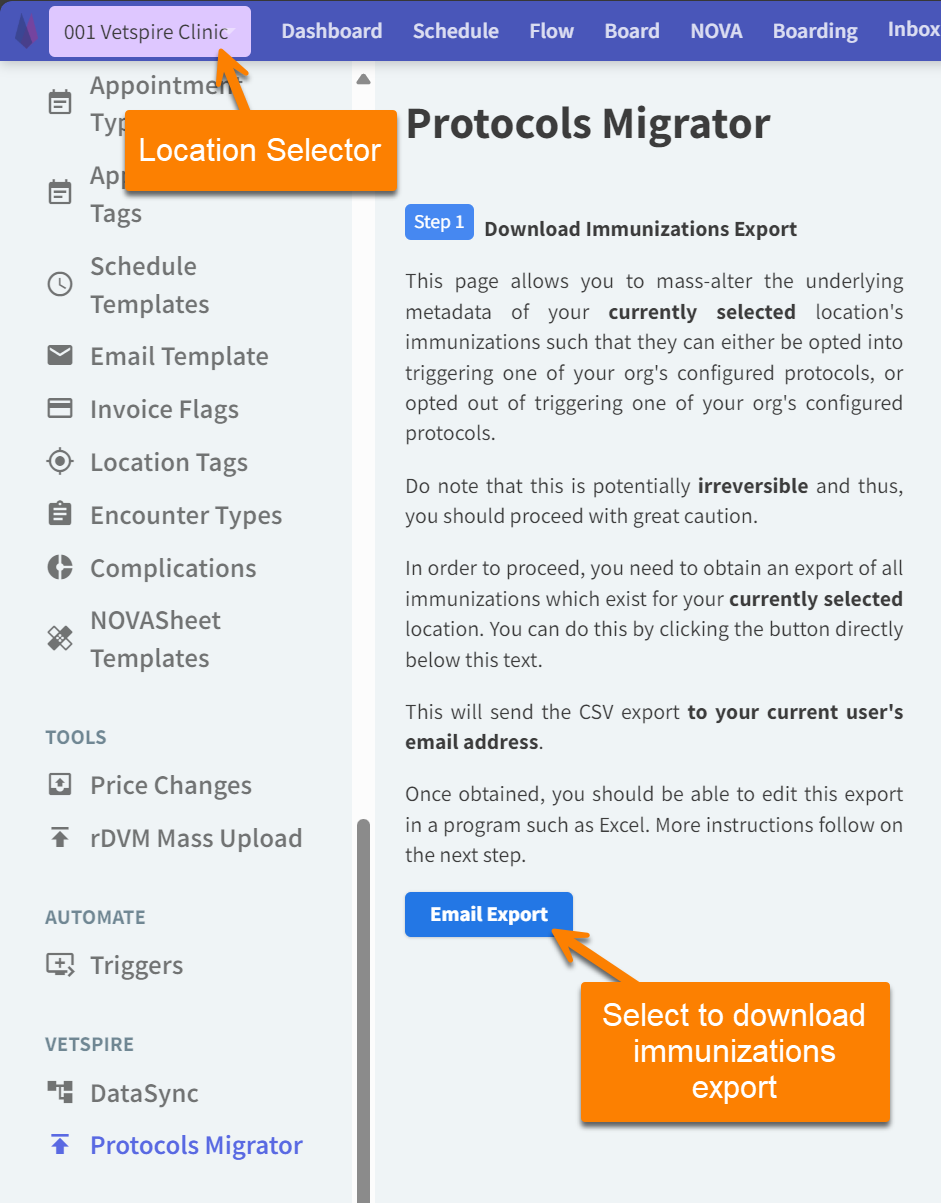
Go to More > Admin > Protocols Migrator.
-
Select Email Export to obtain an Excel file of all immunizations for the currently selected location.
-
Download and open the Protocols Migrator CSV file from your email. The CSV includes the name of the immunization as it displays in Vetspire and columns for Product ID and Protocol ID.
The Protocol ID column will likely be blank for all rows in your first exported file.
-
Enter the Protocol ID for an immunization.
-
When the CSV is imported back into Vetspire, the Protocol ID field will overwrite the Product ID field for the immunization and convert the immunization to a “virtual product.”
-
The “virtual product” is the Vetspire system’s record of the mapping between the legacy reminder and the new Vetspire protocol. It tells Vetspire which protocol to trigger when a legacy reminder is due.
-
-
Save the edited CSV file to your local drive.
-
In Vetspire under Step 3: Update your edits, select Choose File, select the CSV from your file explorer, then select Upload & Update!
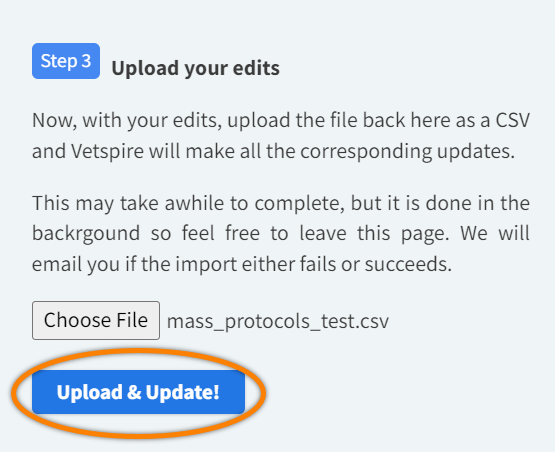
Vetspire will then apply all of your changes to your protocols. You will receive an email when the process is complete.
“Delete” and “Discontinue” Columns in Protocols Migrator CSV
The Protocols Migrator CSV includes two columns, Delete and Discontinue, for managing legacy protocol reminders that are NOT mapped to Vetspire products.
-
Delete: Enter TRUE in this column for an immunization to fully remove the legacy protocol from Vetspire. The immunization will be removed from Patient Chart > Immunizations and from the right panel of Patient Chart under Patient Reminders. This action cannot be undone!
-
Discontinue: Enter TRUE in this column for an immunization that you want to stop reminders for. The immunization will still display in Patient Chart > Immunizations as a historical record (marked as Discontinued). Protocol reminders for the immunization will be removed from the right panel of Patient Chart under Patient Reminders.