You can manually update the stock counts for each of your products in More > Inventory & Services > Manage > Inventory Counts.
If you are using Vetcove: Any products ordered and received through Vetcove will automatically update your quantities on hand in Vetspire.
To change inventory counts in bulk via Excel, see Inventory Upload Mass Change.
Available Actions in the Inventory Counts Report

-
Select Report Date: Select the date that you want to view inventory “as of” (e.g., If you set the date to January 1, 2025, the Inventory Counts report will show you historic inventory counts up to January 1, 2025.)
-
Export Report:
-
Select Download Report to download a CSV file of the report data.
-
Select Email Location Report to send a CSV file of the report data via email to a specified recipient for the selected location only.
-
Select All Locations Report to send a CSV file of the report data via email to a specified recipient for all of your organization’s locations.
-
-
Below Minimum Threshold: Select this checkbox to view only products with stock counts below their minimum threshold (configured in the Product Details).
-
Filters: Filter the Inventory Counts report by Product Type and/or Product Category. You can also use search filters bars to locate products in the following columns: Product, Code, Minimum Threshold, Unit Cost, Contract Cost, and ID.
-
Product Name: Select the product name to navigate directly to the product’s details page.
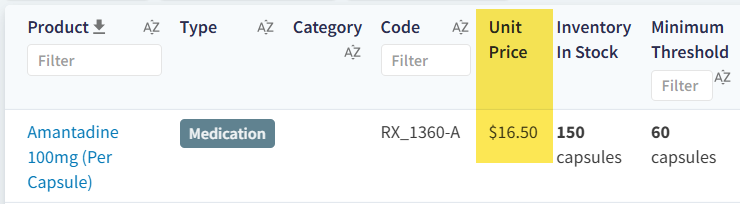
Where is the ‘Unit Price’ for each product sourced from?
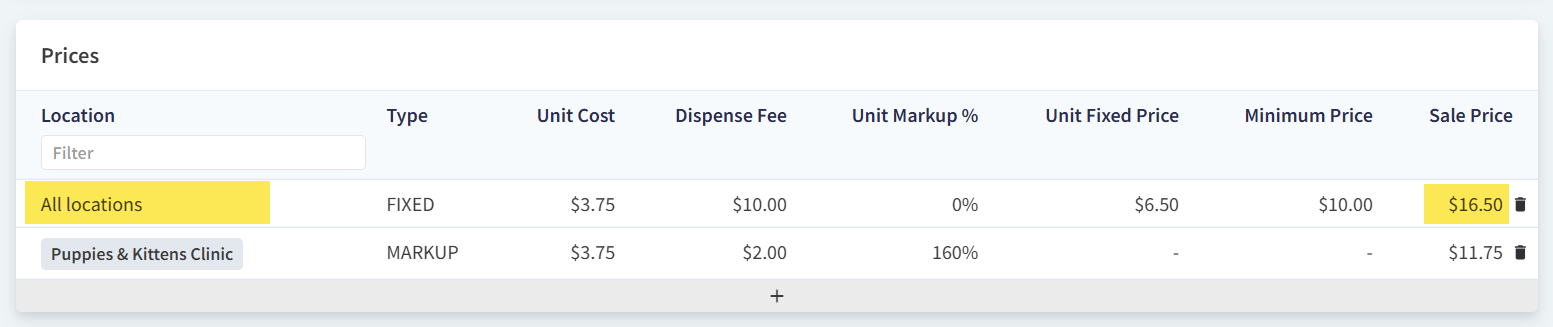
In the Inventory Counts report, the Unit Price column displays the All locations price configured for a product in the product details. This column does not display location-specific pricing.
If the product does not have an All locations price, the Unit Price column will display $0.00.
Inventory Counts:
Product Details:
Update the Stock Quantity for a Product
-
Go to More > Inventory & Services > Manage > Inventory Counts and locate the product you want to edit.
-
Select the Inventory in Stock value in the product row.
-
Enter the total number of units on hand. (Example: If 10 units are currently in stock, and you just received 20 more units, enter 30 for the Inventory in Stock.)
-
Select Save.
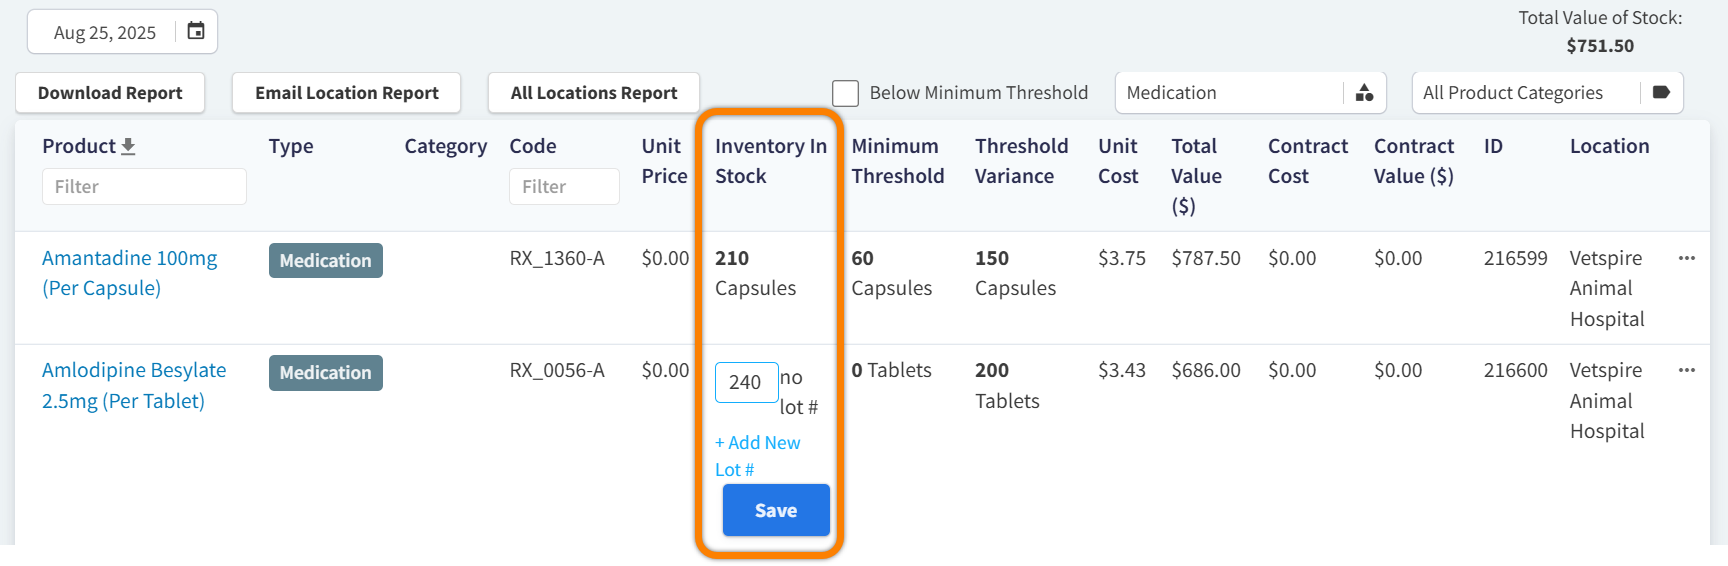
How do I add a stock quantity that is associated with a specific lot number?
To add a stock quantity that is associated with a lot number, such as for a vaccine, select + Add New Lot # in the Inventory in Stock column of the Inventory Counts grid.
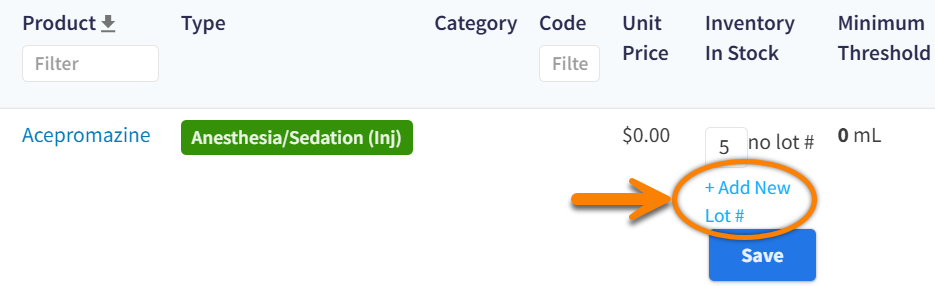
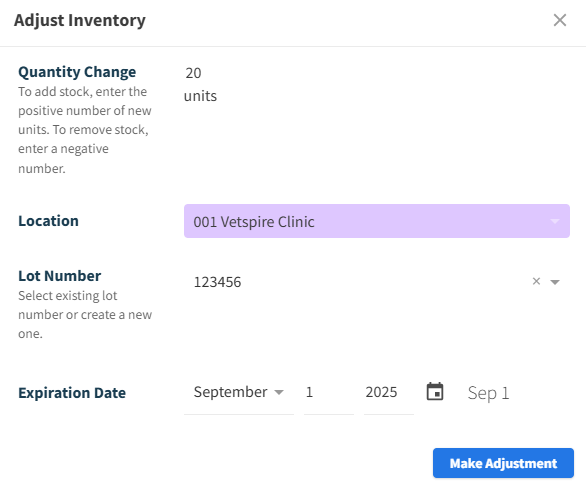
The Adjust Inventory window displays:
-
Enter the number of new units (not the total units on hand) in the Quantity Change field.
-
Select the Location you are editing the stock quantity for.
-
Enter a new Lot Number, or select an existing lot number from the drop-down menu.
-
(Optional) Enter the lot Expiration Date.
-
Select Make Adjustment.
Can I manually deduct stock?
Yes! To manually deduct stock, you can either:
-
Select the Inventory in Stock value in the product row of the Inventory Counts report, then enter a value less than the current stock quantity.
-
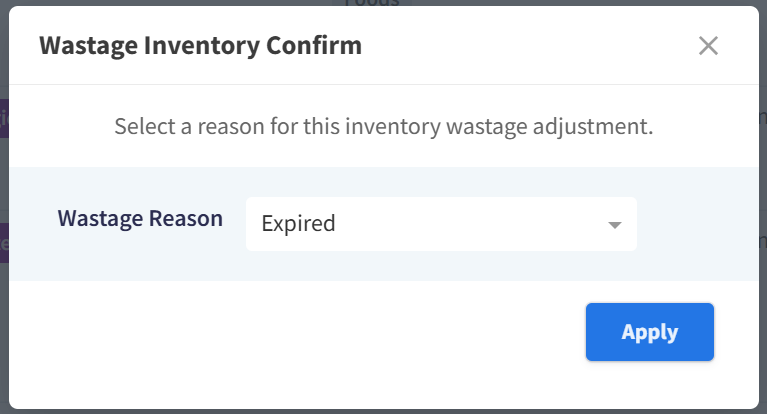
Enter a negative value in the Quantity Change field of the Adjust Inventory window.
The system will then prompt you to select a Wastage Reason to record the manual deduction.
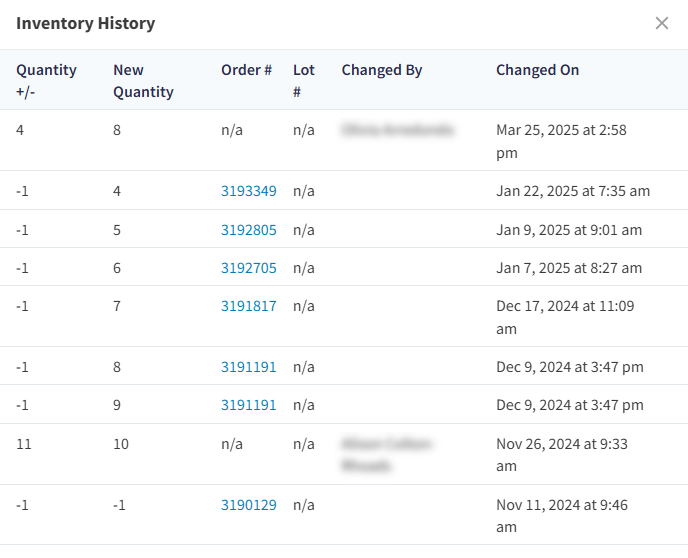
Tip: View History of Stock Quantity Changes
In More > Inventory & Services > Manage > Inventory Counts, select the ellipsis in the product row, then select View Changelog.

The Inventory History window displays each time stock quantity has been added or deducted via an order or in your Inventory & Services settings since your location’s Open Date.
Example: