Like client tags, patient tags can be used to provide additional information to practice staff and to discount client invoices.
In More > Admin > Configure > Patient Tags, you can create, edit, and delete patient tags for all of your organization’s locations.
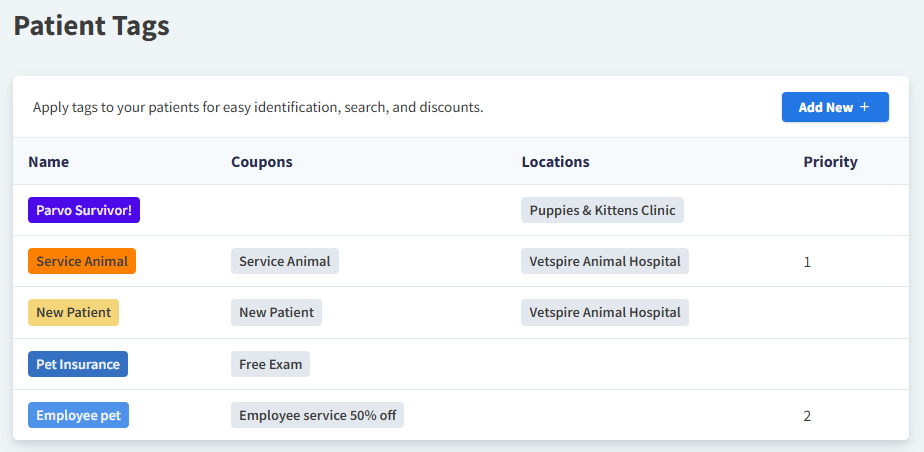
To create a patient tag:
-
Select Add New +.
-
Enter the Name of the tag.
-
Select the tag Color.
-
(Optional) Set the Priority in which the tag is applied.
-
If a patient has more than one tag in their chart, invoices are discounted by the tag with the highest number.
-
The higher the number = the higher the priority. For example, “2” would be applied over “1”.
-
-
(Optional) Link a Coupon to the tag.
-
When this tag is applied in Patient Chart > Info, the coupon will apply to all of the client’s invoices whenever the coupon criteria is met.
-
Coupons are created in Financials > Manage > Coupons.
-
-
(Optional) If the patient tag is only applicable at specific locations, select these in the Locations field. If the patient tag is applicable at all locations, leave this field blank.
-
Select Create.
Video: Create a Patient Tag