Automate Clinic Workflows with Triggers
Triggers in Vetspire can automatically create tasks, send emails, and prompt other events to expedite your clinic operations. Triggers are configured in More > Admin > Automate > Triggers.

How to Create an Automation Trigger
In More > Admin > Automate > Triggers, select Add Trigger.
Choose an event from the If drop-down menu. Available event options are:
appointment canceled
appointment reminder
appointment updated
event block updated
invoice charged
invoice generated
invoice paid
microchip saved
new appointment
new encounter
new event block
new immunization
new prescription
patient document uploaded
prescription deleted
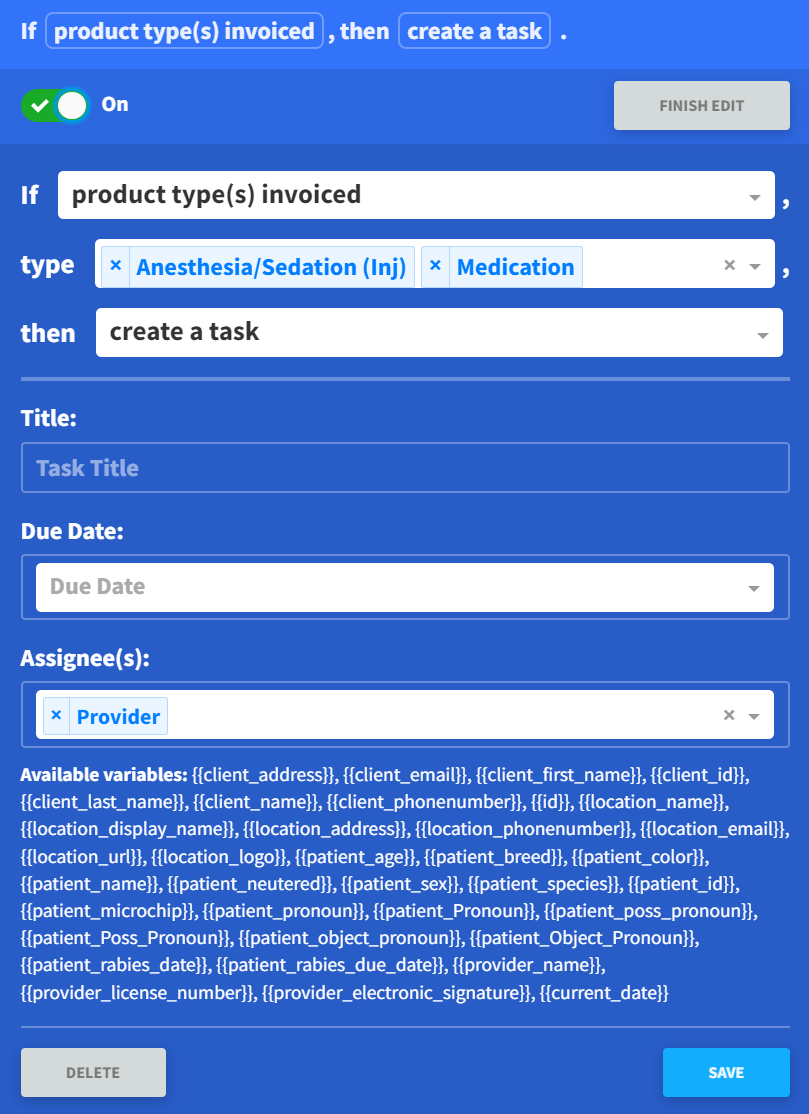
product type(s) invoiced
any reminder
estimate saved
sign encounter
client updated
patient updated
wellness plan payment failed
Choose a trigger action from the Then drop-down menu. Available trigger options are:
Create a task: Set the Task Title, Due Date, and Assignee(s). Tasks can be assigned to a provider, admin, specific users, or Task Groups.
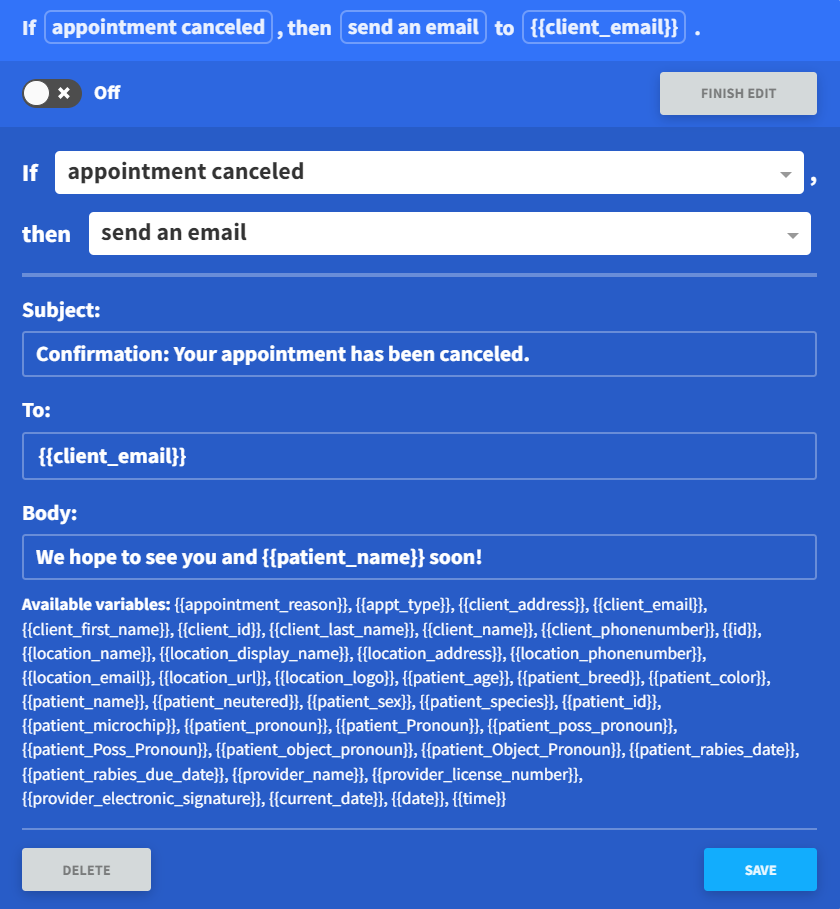
Send an email: Enter the Subject, Recipient (To), and Body of the email.
Webhook (get): Send a GET request to a specified URL.
Webhook (post): Send a POST request to a specified URL.
Select Save.
Assign Trigger Task to Specific Users
For automation triggers that are configured to create a task:
In the Assignee(s) field, select List of Active Users. The User(s) field then displays.
Select which users the task will be assigned to in the User(s) field.
.png?inst-v=99aab3eb-ebeb-4f75-804e-c6f34e137725)
Trigger Variables
Similar to system variables used for macros, forms, and reminders, trigger variables allow you to customize automated email messages, task titles, and webhook requests.
When creating or editing a trigger, available variables for a trigger action display based on the selected If event.
Example: This trigger sends an email to a client when their appointment is canceled and includes their pet’s unique information in the body message.
The trigger applies to all appointment cancelations for all clients, so you don’t have to manually contact a client when their appointment changes.

Video: About Automation Triggers
