In More > Admin > Configure > Schedule Templates, you can create schedule blocks during which specific appointment types can be booked.
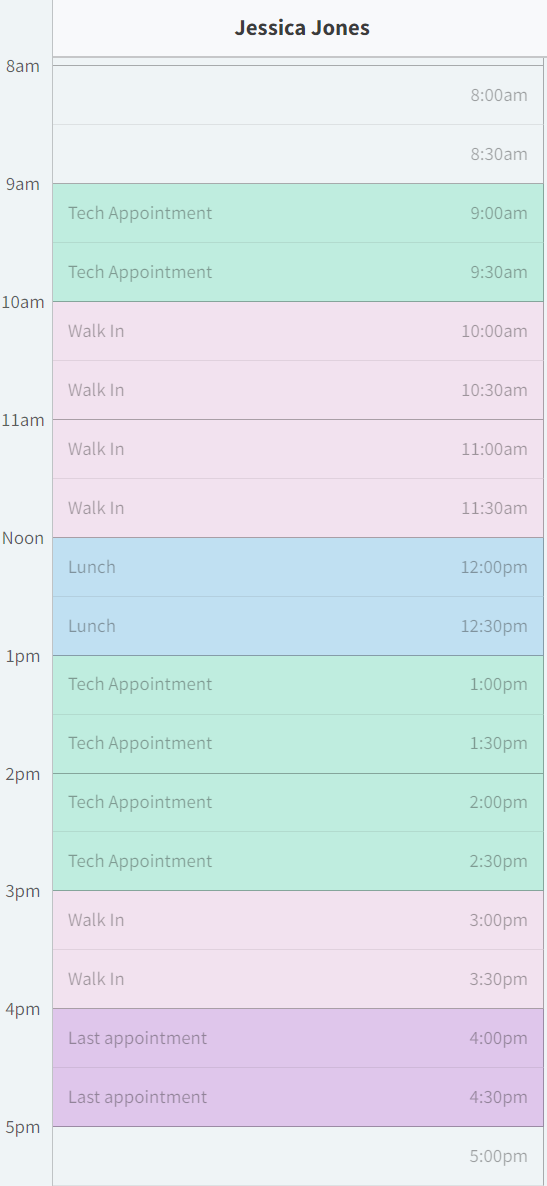
Schedule templates on the calendar give you a quick visual of which appointment types a provider is available for.
Additionally, clients using the Online Booking widget can only book the selected appointment types when a schedule template is applied.
Create a Schedule Template
-
Go to More > Admin > Configure > Schedule Templates.
-
Select Add Schedule Template.
-
Enter a descriptive Name. The schedule template name displays when adding templates to provider schedules.
-
(Optional) In the Locations field, select the location(s) the schedule template applies at. Leave this field blank to make the template available at all locations.
-
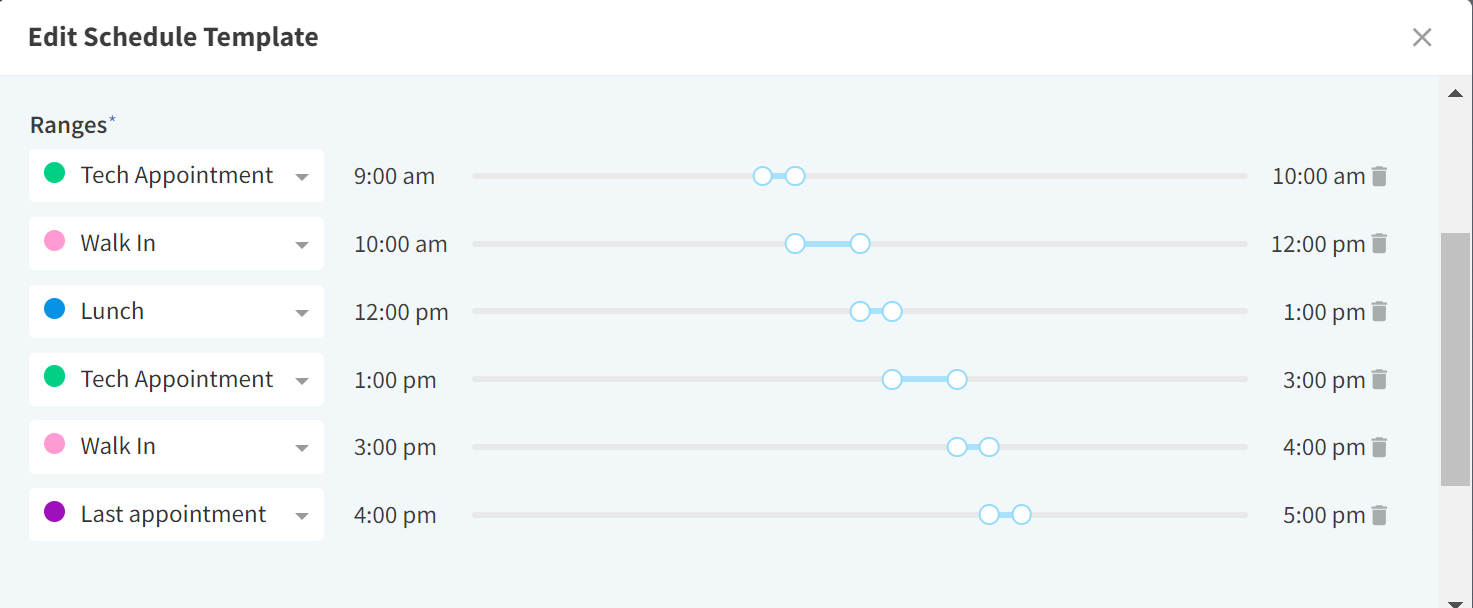
Select New Range. A new range is created for each appointment type and time frame.
-
Select an Appointment Type for the range.
-
Set the range time frame by selecting and dragging each end of the range line to the desired time. (You can select either end of the range line and use the arrow keys on your keyboard to add or subtract 5 minute increments.)
-
-
Create multiple ranges as needed. (Example: 8:00 am - 1:00 pm is blocked off for surgeries, 1:00 pm - 2:00 pm is lunch, and 2:00 pm - 5:00 pm is for general appointments.)
-
Select Create.
Ranges cannot overlap.
If multiple ranges for the same time frame overlap, only the first range in the list displays on the Schedule calendar.
Q: Can I manually override the schedule template?
A: Yes. When booking appointments in Schedule, you can select any appointment type regardless of the schedule template.
Only clients using the Online Booking widget are restricted to selecting the appointment type in the template block.
Add Schedule Template to Provider Schedule
Schedule templates are added to provider schedules in your location’s scheduling settings.
-
Go to More > Admin > Locations and select the location you want to edit.
-
In the Scheduling section of Location Settings, select Edit and then Edit Schedules. The calendar in the Edit Schedules window displays in a monthly view by default.
-
Select a date to begin a new provider schedule.
-
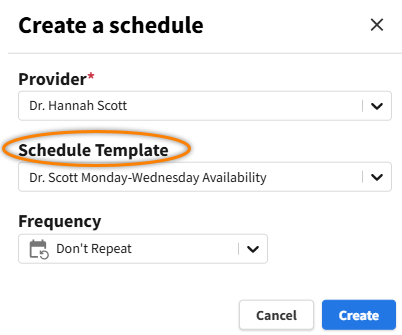
In the Create a schedule window, select the Provider and the Schedule Template.
-
Select Create.
Video: Create a Schedule Template for a Provider