Users with permissions to edit product prices (including admin users) can use the Price Changes tool to update product prices for multiple products at once for a single or multiple locations.
You can tailor your price change to apply to products and locations matching specific criteria:
-
Location Details: The price change applies when the selected product is invoiced at locations matching the set filters. You can enter information in any combination of the fields, and you do not have to enter information into all of them.
-
Product Details: The price change can apply to products with a selected name/code or products linked to a selected type, category, or manufacturer. Enter information in at least one of these fields.
If no Location or Product filters are selected, the price change will affect all products for all locations within your organization.
Go to More > Admin > Tools > Price Changes to view all pending and completed price changes and to create a new price change.
Create a Price Change
-
Go to More > Admin > Tools > Price Changes.
-
Select Create New Price Change to open a new price change sheet.
-
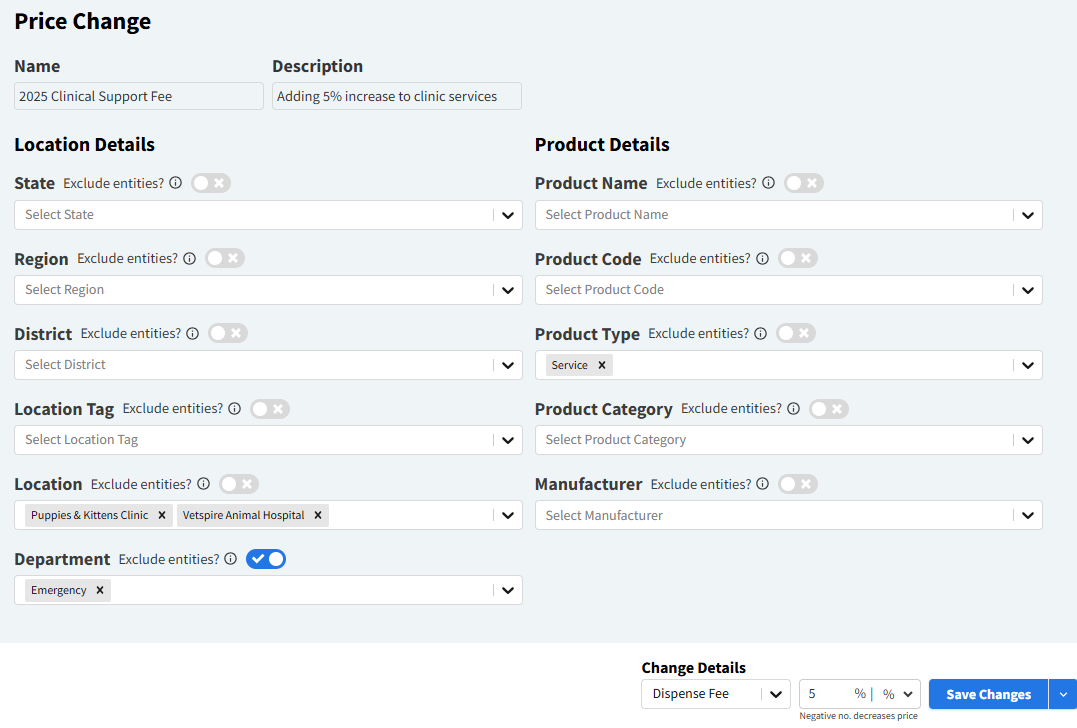
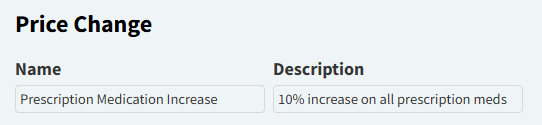
Enter a Name and Description for the change.
Example:
-
Complete the Location Details fields. The following table describes each field:
|
Field |
Description |
Notes |
|---|---|---|
|
State |
Filter the locations by state. |
Example: If California is selected in the State field, only locations in California will be affected by the price change. |
|
Region |
Filter the locations by region. |
You can add a Region to your location in More > Admin > Locations > Edit Basic Info. |
|
District |
Filter the locations by district. |
You can add a District to your location in More > Admin > Locations > Edit Basic Info. |
|
Location Tag |
Apply the price change to all locations with a specific tag. |
Location tags are managed in More > Admin > Configure > Location Tags. |
|
Location |
Apply the price change when the product is invoiced at the selected location(s). |
|
|
Department |
Apply the price change when the product is invoiced by the selected department(s). |
|
-
Enter information in at least one of the Product Details fields. The following table describes each field:
|
Field |
Description |
|---|---|
|
Product Name |
Apply the price change when the selected product is invoiced. You can select multiple products in this field. |
|
Product Code |
Apply the price change when the selected product code is invoiced. You can select multiple codes in this field. |
|
Product Type |
Apply the price change when products with the selected product type(s) are invoiced. |
|
Product Category |
Apply the price change when products with the selected category tag(s) are invoiced. |
|
Manufacturer |
Apply the price change when products from one or more selected manufacturers are invoiced (configured in More > Inventory & Services > Categorize > Manufacturers). |
-
Configure the Change Details at the bottom of the screen:
-
Select the Pricing Type from the drop-down menu: Unit Fixed Price, Unit Cost, Markup Price, Dispense Fee, or Volume Price.
-
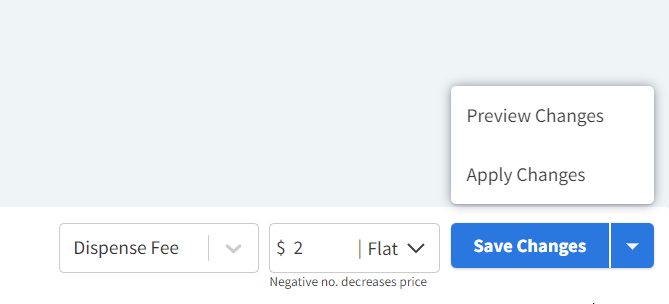
Choose to update the price by percentage or by a Flat rate (dollar amount).
-
Enter a positive or negative numerical value to increase or decrease the product price, respectively.
-
-
Select Save Changes to save your price change in the Pending status.
-
Select Apply Changes to activate the price change. The change then updates to the Completed status.
Applied price changes cannot be deleted.
After you select Apply Changes, the price change can no longer be deleted or edited. Any further changes to the affected products require a new price change.
The Delete button on a saved price change sheet allows you to clear the data you’ve entered and start over.
Preview the Price Change Before Applying
You can preview all products that will be affected by the price change and their updated costs before applying the change.
Select the arrow next to the Save Changes button, then select Preview Changes. The system will then download a CSV file of the affected products.
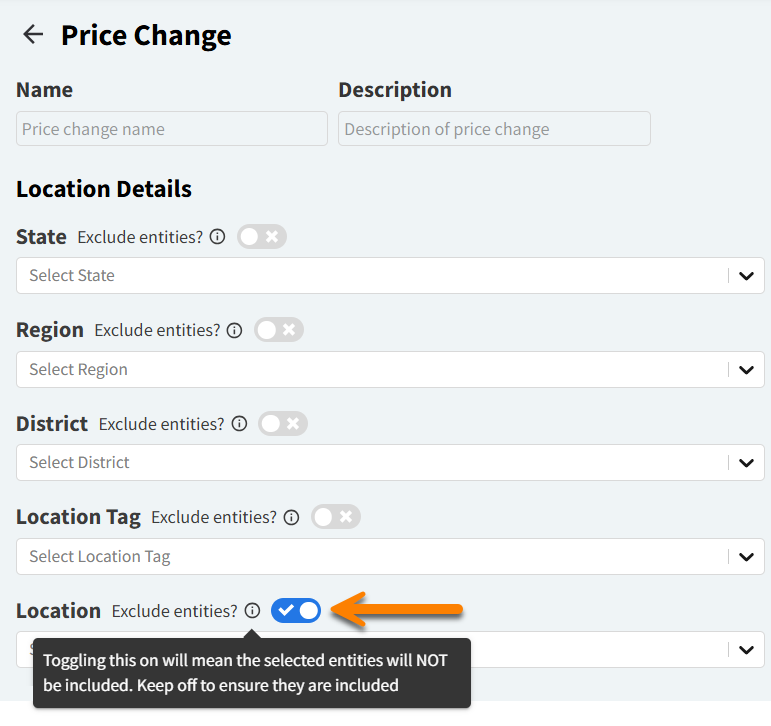
What is “Exclude Entities?”
Each field has a Exclude Entities? toggle. This option allows you to exclude selected values from the price change.
For example: Let’s say your organization’s ER locations are tagged as “Hospital.” When you select Hospital in the Location Tag field and toggle on Exclude Entities, the price change will NOT apply to products at the “Hospital” tagged locations.
Troubleshooting: Excluding Locations During Price Change
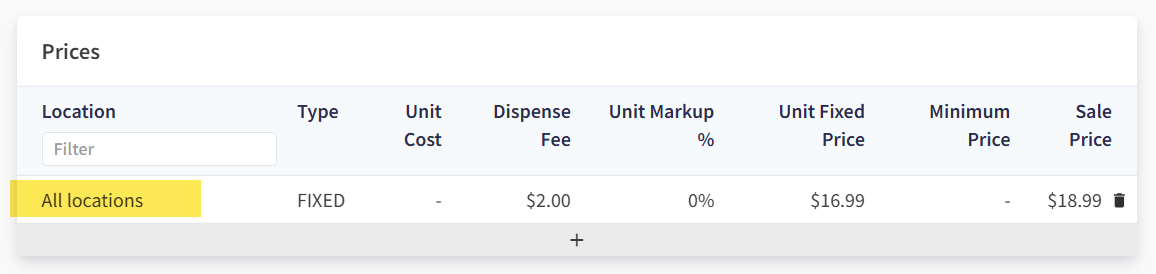
When using the Price Changes tool, you can exclude specific locations as long as those locations have their own product pricing configurations.
If a product linked to the selected excluded location only uses All locations pricing (in the Prices section of the product details), pricing for the product can be updated using the Price Changes tool.
Because the All locations price is not linked to a specific location, the system does not know to exclude the product from updates made with the Price Changes tool.