Patient appointments can be created on the Schedule calendar, Flow, and Patient Chart.
Create an Appointment in Schedule
-
Access the Schedule calendar from Global Navigation, then select New Appointment. This opens the Schedule Appointment window.
-
In the ‘Search patients or clients’ field at the top of the window, search for and select the client/patient you want to book.

When you select a patient, the Patient Banner displays at the top of the Schedule Appointment window. The banner displays key patient details (species, breed, age, alerts, etc.) and displays a ‘$ Due’ indicator when the client owes an outstanding balance.
-
Complete the appointment information fields. See the Appointment Details Reference below for more information on each field.
-
Send Confirmation Email is checked by default. Uncheck if you do not want to send an appointment confirmation email to the client.
-
Select Create Appointment.

Appointment Details Reference
|
General Appointment Details |
||
|---|---|---|
|
Field |
Description |
Notes |
|
Appointment Type (Required) |
Select the relevant appointment type. |
Appointment types are configured in More > Admin > Configure > Appointment Types. |
|
Appointment Status (Required) |
Select the appointment status. |
Available options: Planned, Confirmed, Checked In, Ready for Discharge, In Progress, Completed, No show, Pending, Canceled, or Daycare. |
|
Provider |
Select the provider who will be working with the patient during their appointment. |
When you select a Provider, you can only choose from the provider’s assigned departments in the Department field. |
|
Additional Providers |
Select one or more additional providers who will also be involved in the patient’s appointment. |
|
|
Appointment Date (Required) |
Adjust the date if different from the current date. |
|
|
Appointment Time & Duration (Required) |
Set the appointment start time and duration. |
|
|
Recurrence |
If this is a recurring appointment, set the frequency as Daily, Weekly, Monthly, Yearly, or Custom. |
This field is set to Does not repeat by default. |
|
Reason for Visit |
Type in or select the relevant reason for the appointment. |
Your org preferences determine whether this is a free-text entry field or a drop-down menu with predefined options. |
|
Additional Details |
||
|
Field |
Description |
Notes |
|
Custom Schedule |
Select a custom schedule to display this appointment in the selected column on the Schedule calendar. |
|
|
Department |
Select the relevant department for the appointment. This field only displays org departments that are enabled for the location. |
When you select a Department, you can only choose from the providers who are assigned to the department in the Provider field. |
|
Visit Type |
Select the relevant visit type. |
Predefined visit types are enabled by admins in your org preferences. |
|
Appointment Notes |
Enter additional details about the appointment. These notes are internal only. |
|
Add Drop Off & Pick Up Details to Appointment
When a client needs to drop off their patient at your practice, you can schedule the drop off and pick up times within the appointment details.
-
In the Schedule Appointment window, expand the Drop Off / Pick Up section.
-
In the Drop Off Time field, enter the time that the client will bring their patient to the hospital. (Appointment reminders will be sent based on the Drop Off Time.)
-
Enter the date in the Pick Up Time field when the client will return to the location to collect their patient. This date can differ from the Appointment Date.
-
Enter the time that the client will return to the hospital in the Select pickup time field.

-
Complete the other appointment information fields as needed, then select Create Appointment.
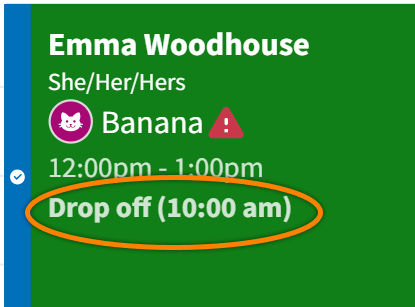
The patient’s Drop Off Time displays on the appointment tile on the Schedule calendar,
-
Appointment reminder texts are sent to the client based on the Drop Off Time.
-
Appointment confirmation emails are sent to the client based on the Appointment Time.
You can send a Pick Up Text to the client when the patient is ready for pickup.
-
Select the appointment tile on the Schedule calendar, then select the pencil icon to edit the appointment details.
-
In the Schedule Appointment window, expand the Drop Off / Pick Up section.
-
Select the Send Pick Up Text button next to the Pick Up Time fields.
The text message is recorded in Patient Chart > Messages.
Create an Appointment in Flow
-
In the Awaiting, Waitlist, or Checked In columns, search for the client or patient in the search bar by name, ID, or phone number, then select their profile.
-
For new clients, select the plus sign ➕ to open the Create a New Client window.
-
-
The Appointment Date and Time default to the current day and time. Edit these fields as needed.
-
Select the Provider and Type.
-
Edit the Appointment Status as needed. This field defaults to the status of the column you selected to create the appointment in Step 1.
-
(Optional) Enter the Room Number and Reason for Visit.
-
Select Create Appointment.
Create an Appointment in Patient Chart
-
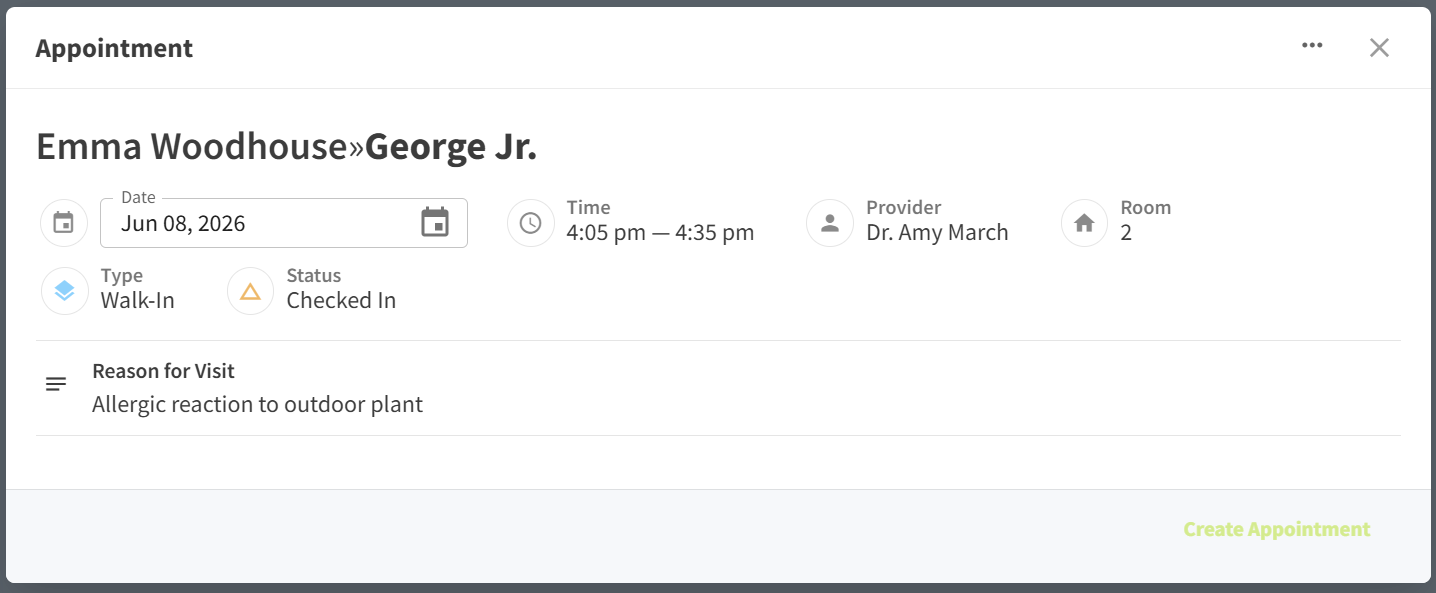
In the Chart tab, select New Appointment. This opens the Schedule Appointment window.

-
Select the Appointment Type and Appointment Status.
-
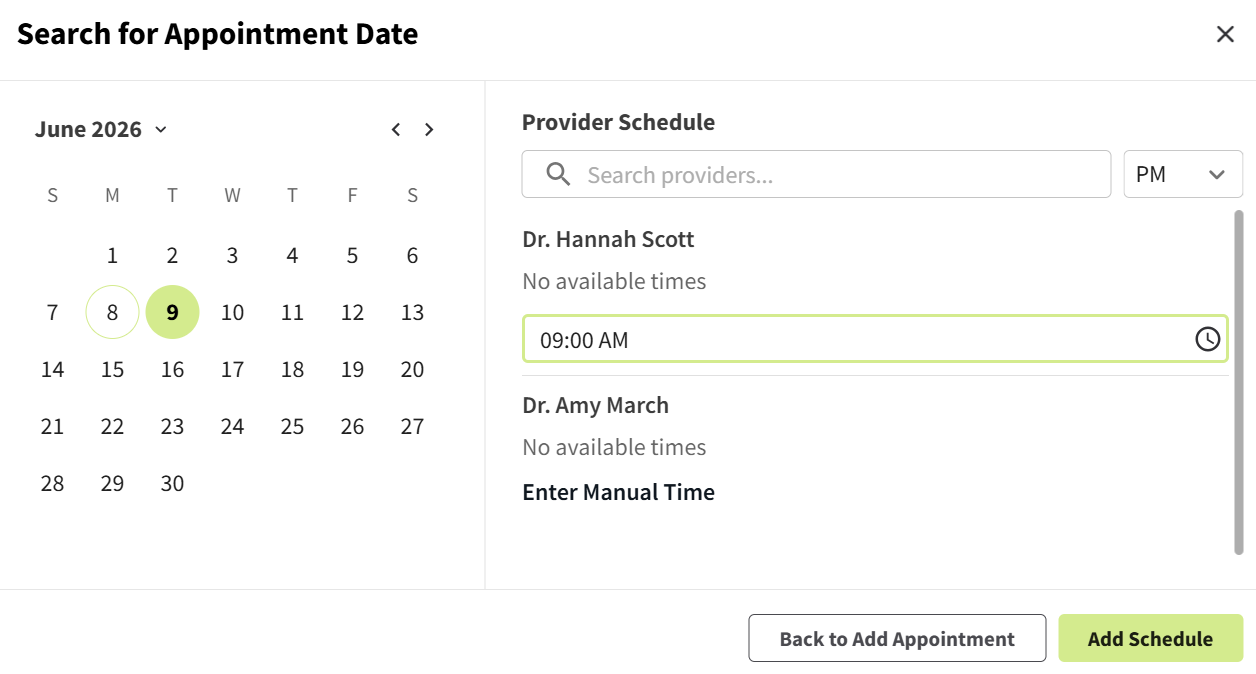
Select the Appointment Date field to open a calendar and list of available providers:
-
Select the appointment date on the calendar.
-
For the provider who will see the patient during this appointment, select one of their available appointment time slots (if your practice uses provider schedules) or select Enter Manual Time to set the appointment start time. The selected provider populates the Provider field.
-
Select Add Schedule.
-
-
(Optional) Edit the appointment Duration and Recurrence as needed.
-
(Optional) Enter or select a pre-configured Reason for Visit.
-
(Optional) Expand the Additional Details section to select a Custom Schedule, Department, and Visit Type and enter Appointment Notes.
-
(Optional) Enter Drop Off / Pick Up information and complete Custom Fields as needed.
-
Send Confirmation Email is checked by default. Uncheck if you do not want to send an appointment confirmation email to the client.
-
Select Create Appointment.