
Import Code File
This section will detail how to use the import file to update existing codes. To import new codes, see Create New Codes.
Download the Existing Vetspire File
Navigate to
More > Inventory & Services, scroll down to Tools and select Products Upload.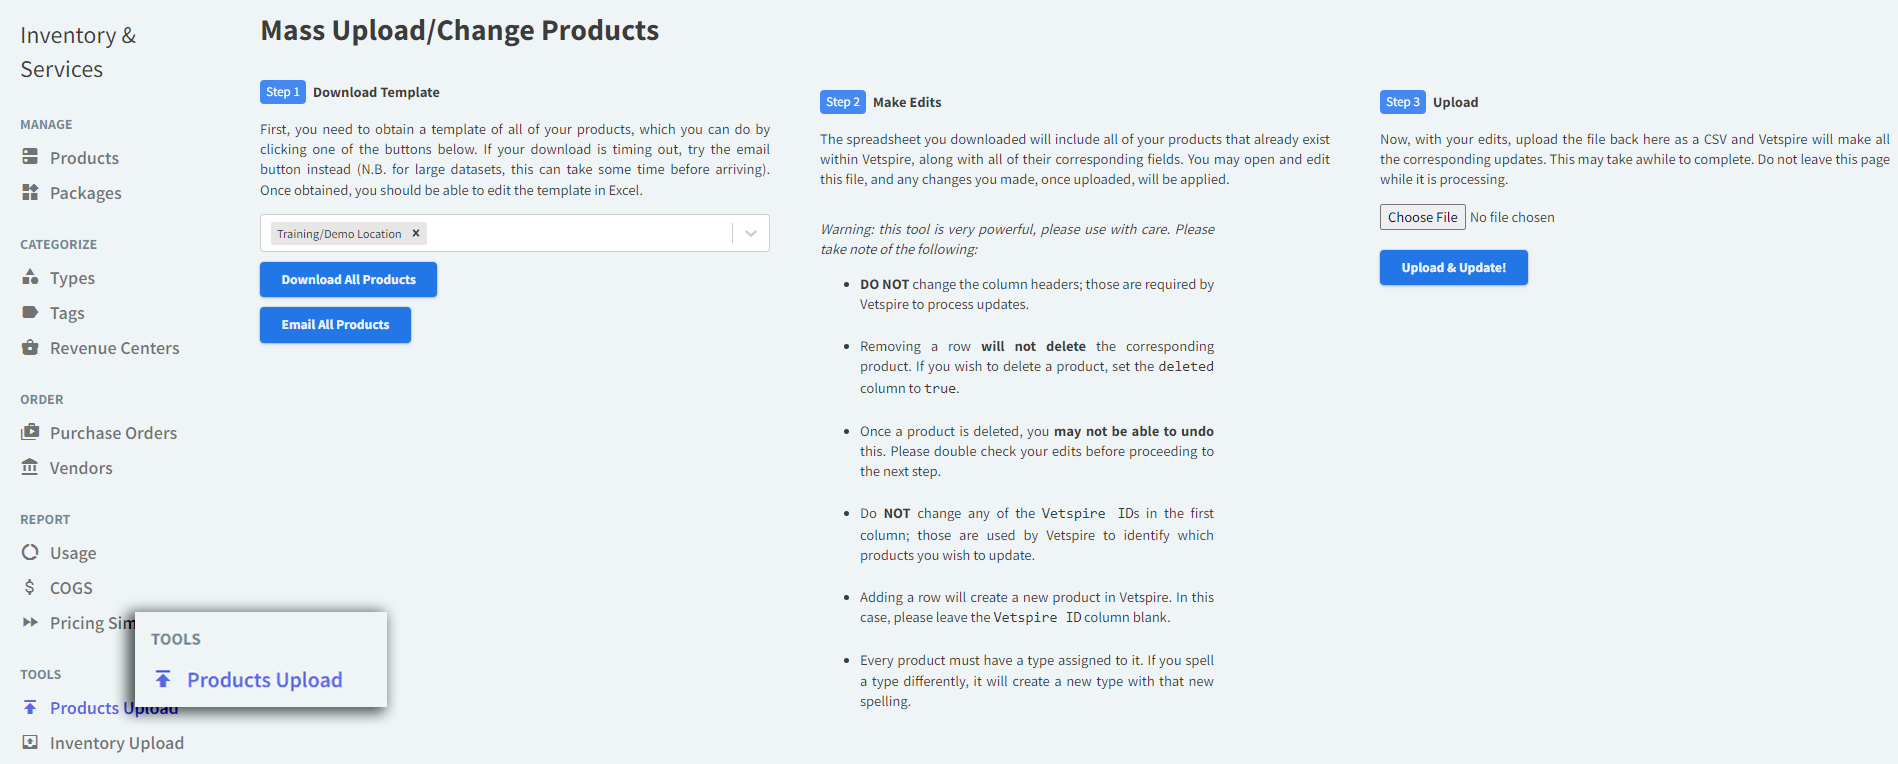
In the Filter to Locations box, enter the correct locations. Leave this field blank to select all locations.
Select Download All Products.
IMPORTANT: FROM THE TIME THE PRODUCT FILE IS DOWNLOADED UNTIL THE IMPORT IS COMPLETE, THERE IS A RISK OF OVERWRITING ANY CHANGE MADE TO VETSPIRE.
BEST PRACTICE: ENSURE ALL USERS STOP UPDATING PRICES OR MAKING CHANGES TO THE PRODUCT CODES WHILE WORKING ON THE IMPORT.
USERS MAY STILL INVOICE FOR PRODUCTS WITHOUT AFFECTING THE UPLOAD.
Edit the File
Open the file.
Review the Columns section on what can be edited and make any changes needed.
Remove any rows you are not changing.
If you do not want all the codes you are importing to be enabled on all locations, go to the far right, add a new column titled Disabled and put TRUE in each cell.
Import the File
Navigate to
More > Inventory & Services,scroll down to the Tools section and select Products Upload.Select Choose File and locate the CSV file.
Select Upload & Update!
Once the file is successfully imported, check your work to ensure the changes came in successfully. This can be done by manually checking 4-5 products from the import.
Refer to the Troubleshooting section for tips if you get an error message.
NOTE: IF YOU GET AN ERROR, THE FILE IS LIKELY TOO LARGE. TRY AGAIN USING “EMAIL ALL PRODUCTS”. THE FILE WILL BE EMAILED TO YOU IN LESS THAN 15 MINUTES. IF IT STILL DOES NOT WORK, CONTACT SUPPORT.