The Patient Chart in Vetspire is an individual patient’s profile that includes all of their essential information, medical and immunization history, diagnostic orders, invoices, and more. The Patient Chart is also where you conduct encounters.
You can access Patient Chart by selecting a patient’s name from anywhere in Vetspire.
Client and Patient Banners
The Client Banner and Patient Banner display at the top of Patient Chart.
-
Client Banner: Displays the client’s contact information, patient associates, and client tags. Select the client’s name to access their client profile.
-
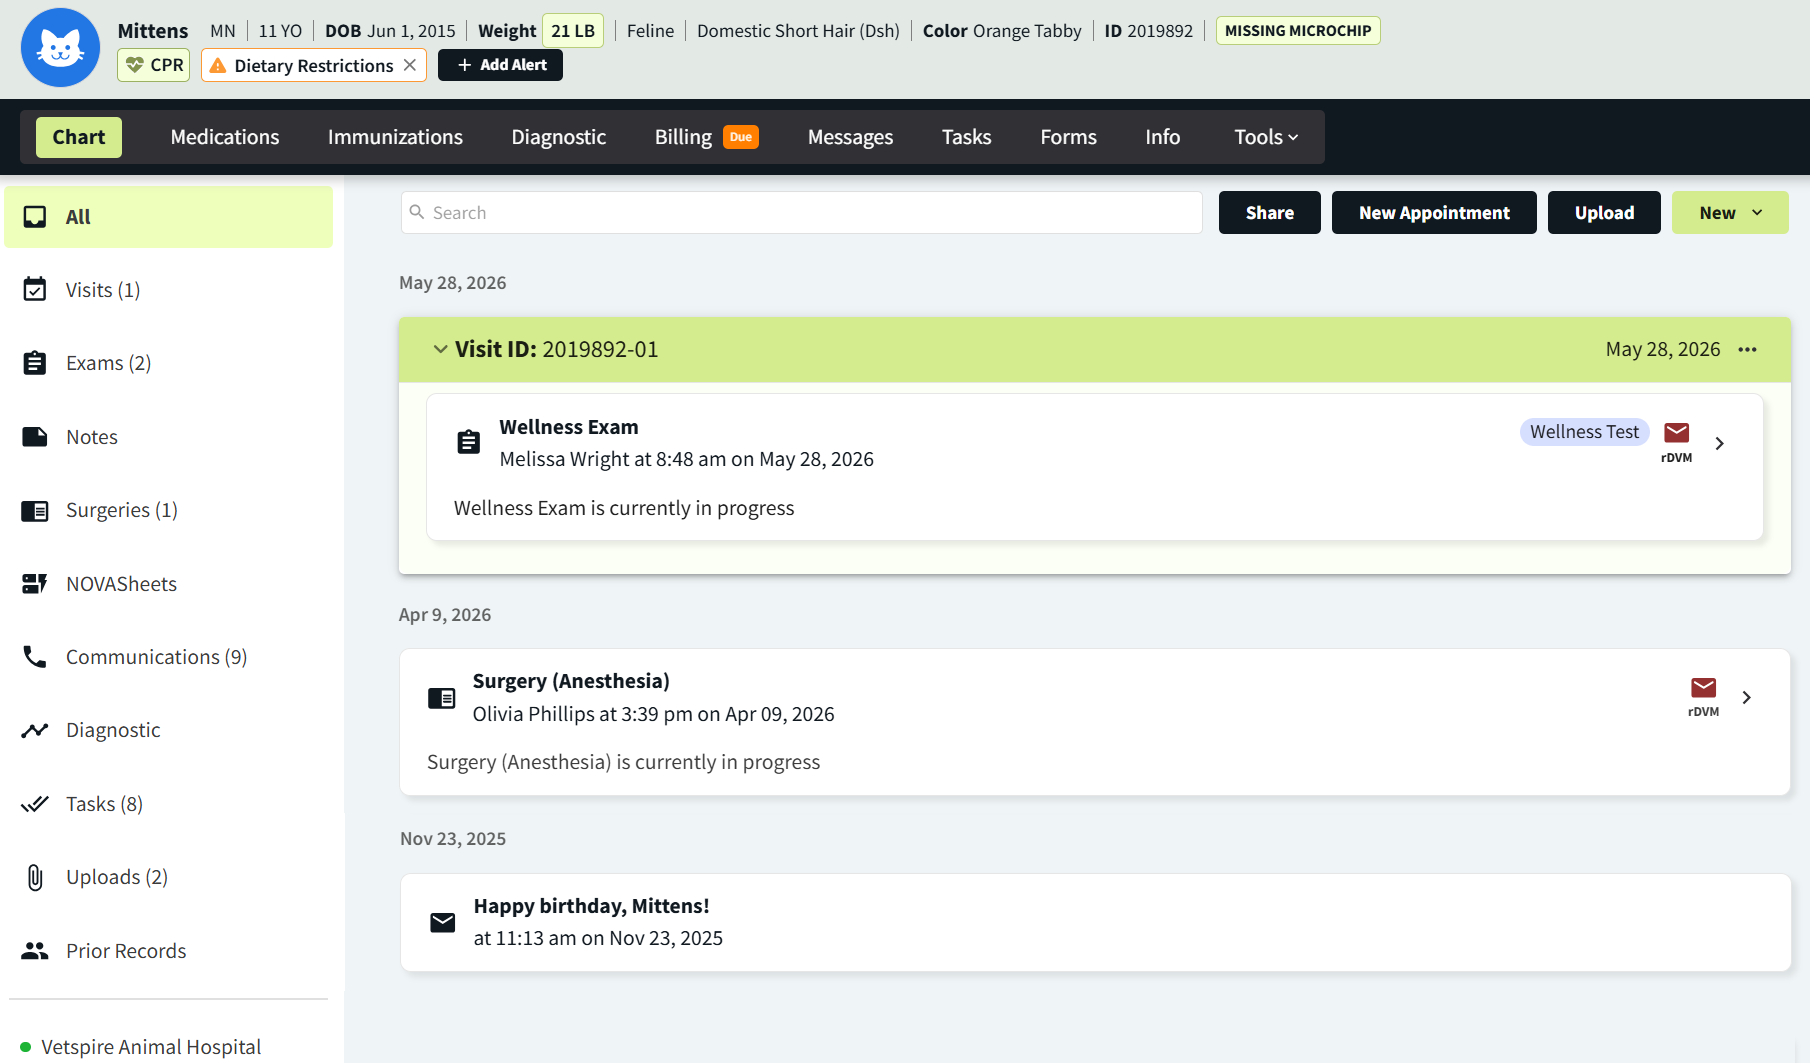
Patient Banner: Displays essential details about the patient, including age, gender, altered status, species, and breed. From the Patient Banner, you can navigate to different sections of the chart (Medications, Immunizations, Diagnostic, etc.) and access the AI Patient Summary.

Available Actions in Patient Chart Banners
|
Action |
Description |
|---|---|
|
Multiple Pets 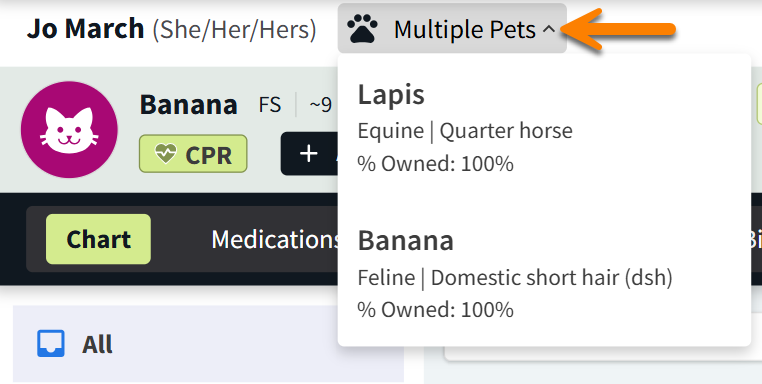
|
When multiple patients are linked to a client, the Multiple Pets menu displays. Choose one of the client’s other pets to switch to that patient’s chart. |
|
Patient Avatar |
The patient avatar is a species-specific icon and is color-coded by gender (pink for females, blue for males, and gray for unspecified). This is the default avatar before you upload the patient’s photo to their chart. To upload a photo of the patient from your file explorer, hover over the avatar and select the Add Photo icon. |
|
Client Tags 
|
Client tags display on the right side of the Client Banner. You can add a client tag in the client’s profile. Client tags are managed in More > Admin > Configure > Client Tags. |
|
Patient Alerts 
|
Patient alerts are used to make clinic staff aware of a patient’s unique needs (for example, ‘Senior,' ‘Contagious,' ‘Will Bite’). Select + Add Alert to choose a pre-configured alert or create a custom alert. Alerts are managed in More > Admin > Configure > Patient Alerts. |
|
Patient Tags 
|
Patient tags are used when searching for patients, running reports, and adding discounts. In the Patient Banner, patient tags display next to alerts. These tags are managed in More > Admin > Configure > Patient Tags. To add a patient tag: In Patient Chart, go to Info > General section and select a tag from the Tags drop-down menu. |
|
Patient Weight 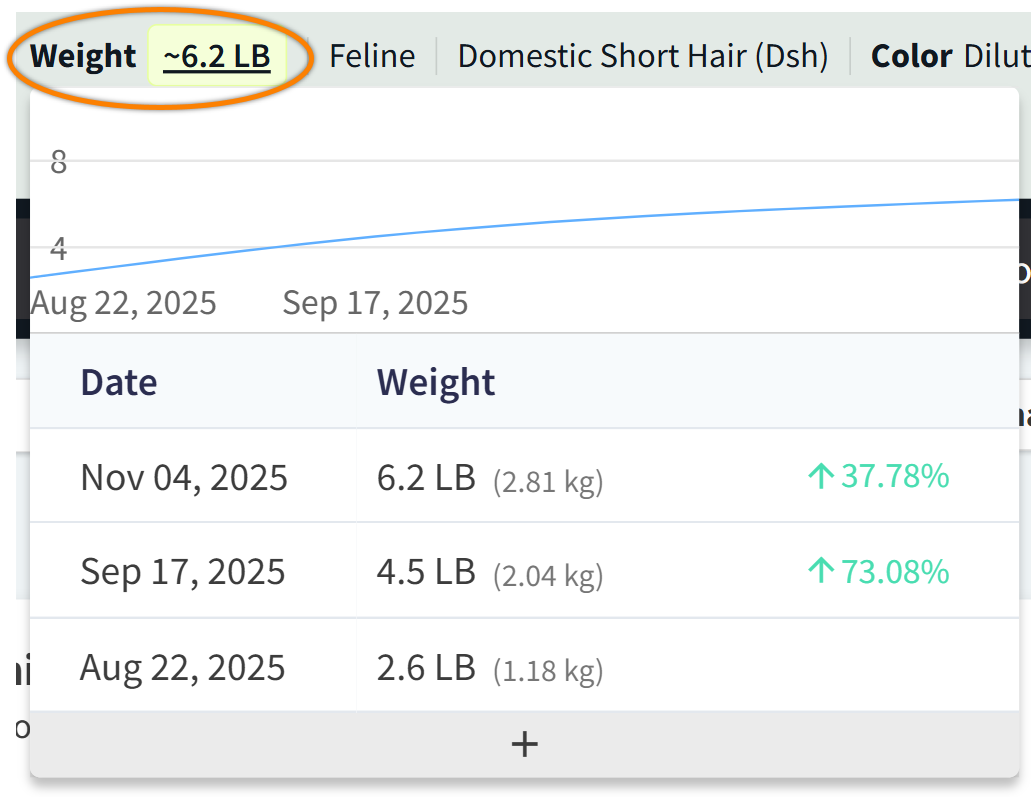
|
Select Weight to record a new weight and view the patient’s history of weight changes. When you record a new weight for the patient in an encounter or NOVASheet, the weight is also updated in Patient Banner. |
Access Open Encounters in Patient Chart
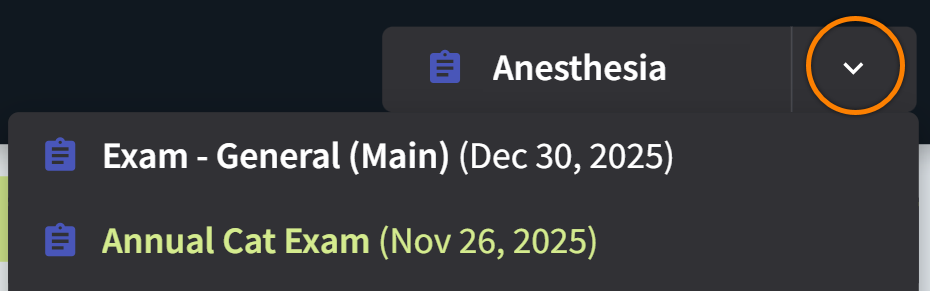
Open encounters and NOVASheets that have not been signed display in the Patient Banner. Select the NOVASheet or encounter name to navigate directly to it.

When a patient has multiple open encounters, a drop-down arrow displays. Select the arrow to open a menu of the patient’s open encounters, then select one of the menu options to go to that encounter. The most recent open encounter displays in Patient Banner by default.
Notes and Reminders
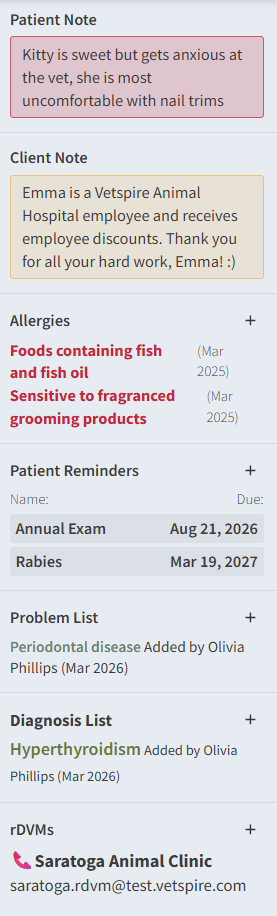
The right panel of Patient Chart always displays no matter which section of the chart you are in. Select the arrow 
The right panel includes the following features:
-
Patient Note and Client Note: Write internal notes about the patient and client for other staff members, such as preferred provider or the patient’s favorite treat!
-
Allergies: Record the patient’s allergies, if any.
-
Patient Reminders: View and manage reminders for protocols and immunizations. See Manage Patient Reminders for more details.
-
Problem List: Record any of the patient’s new and ongoing issues or ailments using terminology from the SNOMED database.
-
Diagnosis List: Record any of the patient’s current and historical diagnoses and link to relevant treatments from the SNOMED database.
-
rDVMs: Search for and select the profile of the patient’s referring veterinarian. (rDVM profiles are configured by your organization admin in More > Admin > Configure > rDVMs.)
About Patient Chart Timeline
Patient Chart opens to the Chart tab by default. This tab displays a timeline of active and previous appointments, client communications, tasks, uploads, and more.
Use the filters in the left panel of Chart to view specific records:
-
Visits: All of the patient’s open and closed visits.
-
Exams: All of the patient’s open and closed/signed encounters.
-
Notes: Internal notes added via New > Quick Notes.
-
Surgeries: All of a patient’s encounters that have the Surgery? setting set to Yes in the encounter template.
-
NOVASheet: All of the patient’s NOVASheets (for practices using NOVA).
-
Communications: All email and text message conversations with the client, including reminders. To record additional client conversations in this section, select New > Quick Notes and then Phone Call or Communication Log.
-
Diagnostic: Results from diagnostic tests ordered through a Vetspire lab integration (such as IDEXX or Antech).
-
Tasks: Patient tasks assigned to any Vetspire user.
-
Uploads: Any attachments added via the Upload button in Patient Chart. See Upload Documents in Patient Chart for more details.
-
Prior Records: Uploads that are categorized as rDVM Records.
-
Locations: Lists all locations a patient has been to. Select one or more location(s) to filter the timeline to only show records from the selected location(s).
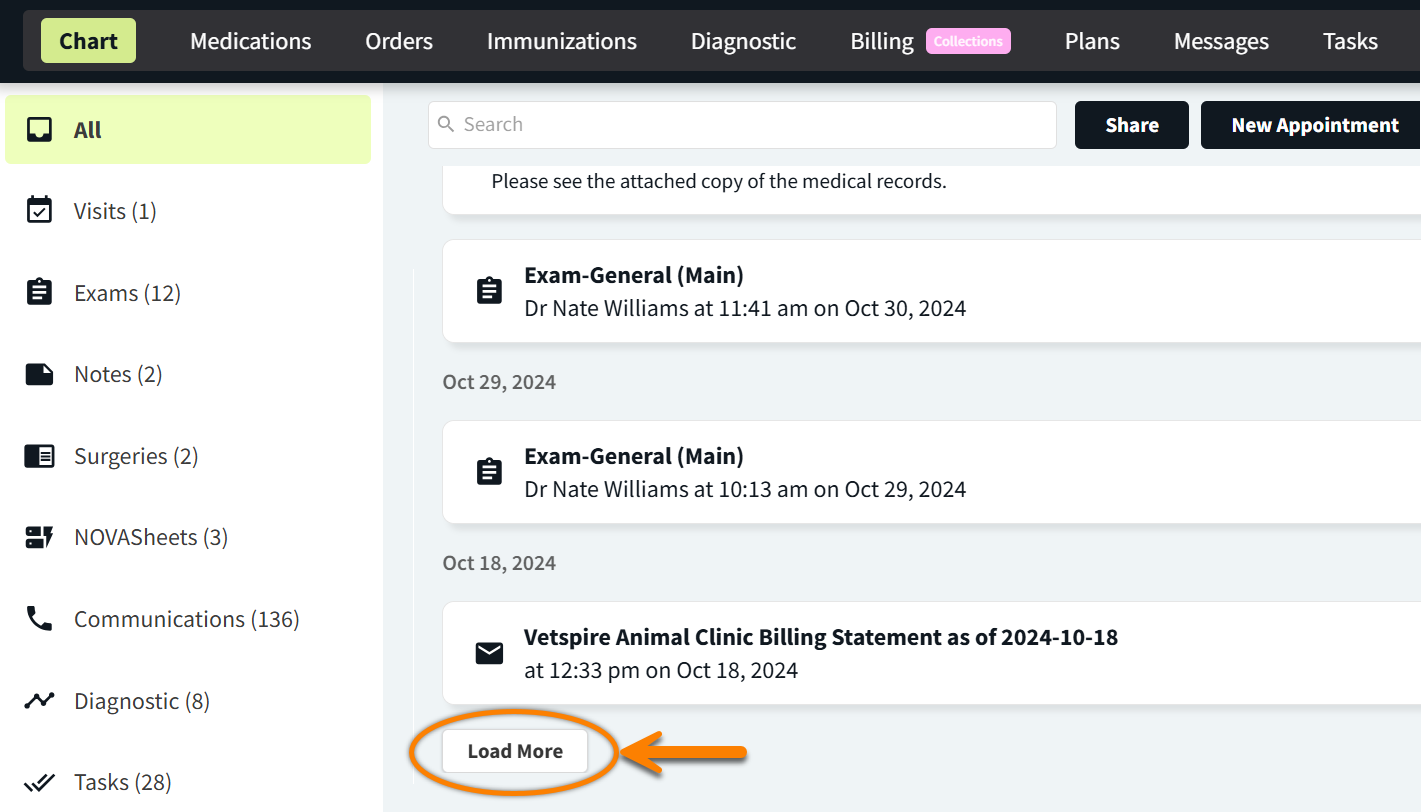
For patients with extensive medical records, a Load More displays at the bottom of the Patient Chart timeline.
Available Actions in the Chart Tab
-
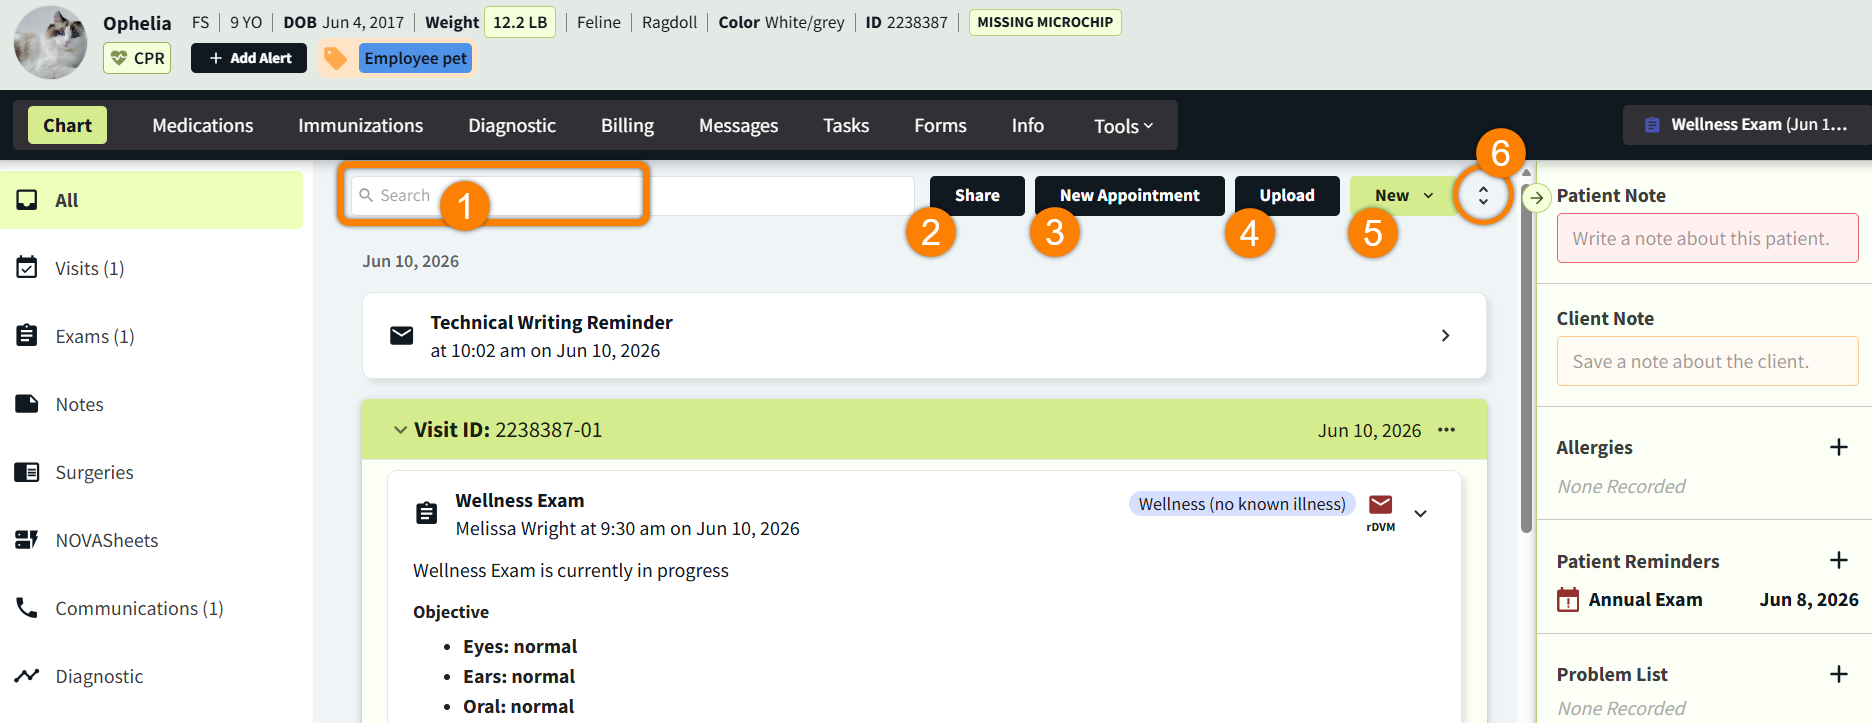
Search bar: Search the patient’s entire medical record for any keyword or billable product that was previously invoiced.
-
Share: Select specific encounters, NOVASheets, communications, or other items in the Chart timeline to send to the client, rDVM, or other recipients via email. Select Preview to download the selected items in a single PDF file.
-
New Appointment: Select to schedule a new appointment. Upcoming appointments display in the All view of the Chart tab and are added to Schedule.
-
Upload: Select to upload a PDF document or JPEG image file from your device. (The file size limit is 50 MB).
-
New: Select to create a new encounter (that is not associated with an appointment or visit), note, or NOVASheet.
-
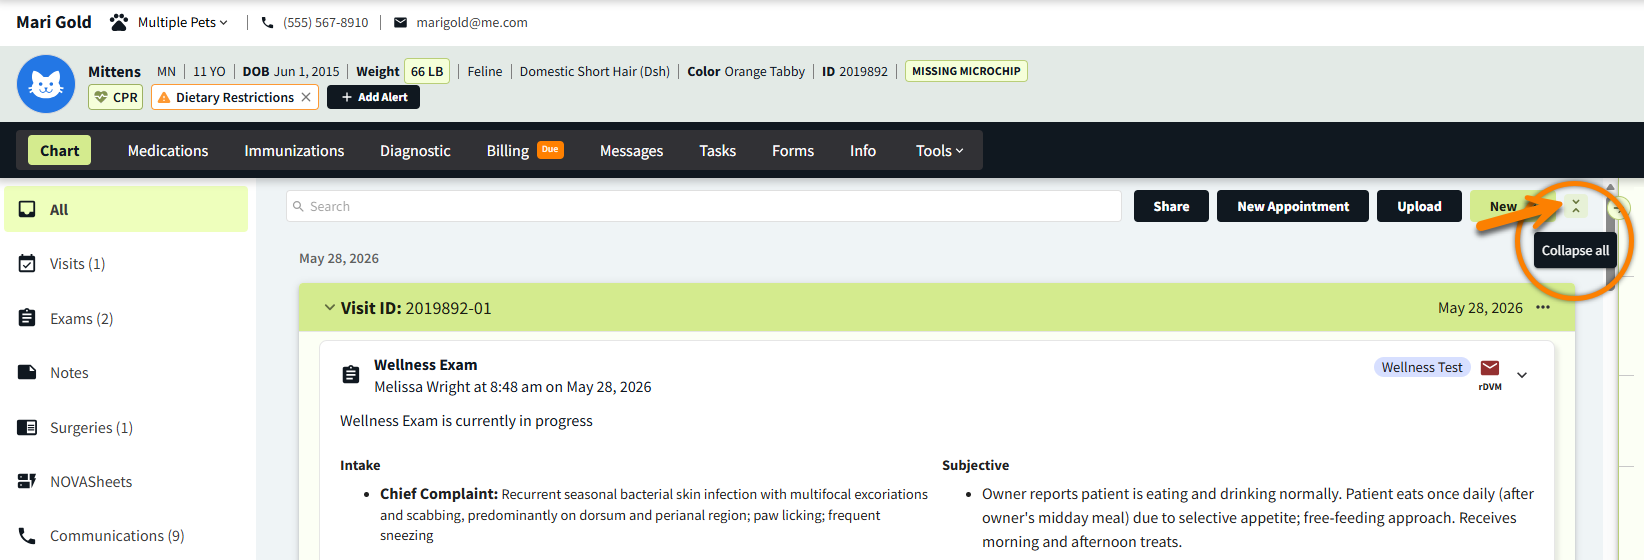
Expand All/Collapse All: Select to expand or collapse all records on the timeline in a single click. When you select Expand All or Collapse All, your selection is saved for the next time you view the patient’s chart. Individual encounter cards on the timeline can be independently expanded or collapsed as needed.