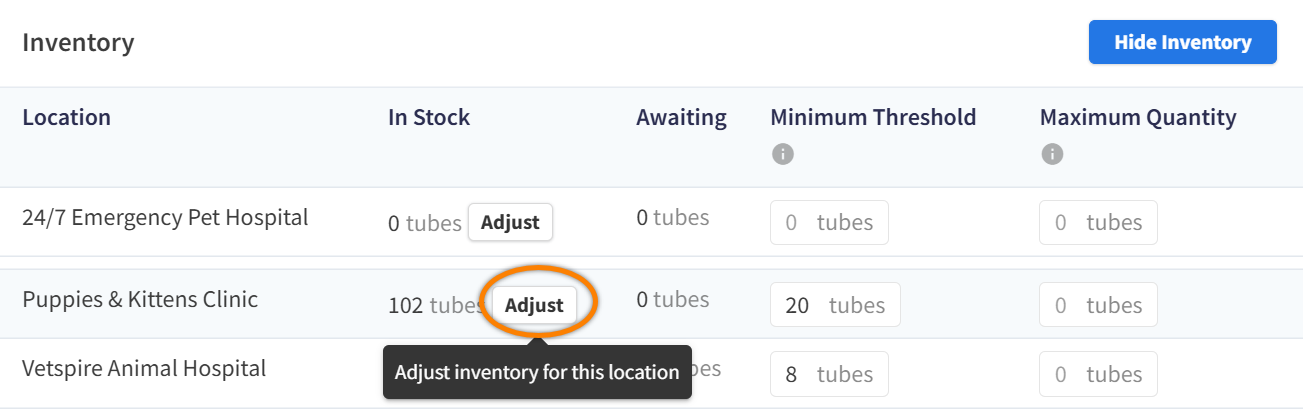
Stock counts can be added for individual products and specific locations in the Inventory settings of the product details window.
To add stock counts for a product:
-
Go to More > Inventory & Services > Manage > Products.
-
Search for and select the product you want to edit. The product details panel then displays.
-
Scroll down the panel to the Inventory section, then select Show Inventory.
-
In the row for the location you want to edit, select the Adjust button in the In Stock column. This opens the Adjust Inventory window.
-
Enter the received stock quantity in the Quantity Change field.
To deduct stock, you can enter a negative number in this field (e.g., -20).
-
(Optional) Select or create a new Lot Number, if applicable.
-
(Optional) Enter the product’s Expiration Date.
-
Select Make Adjustment.

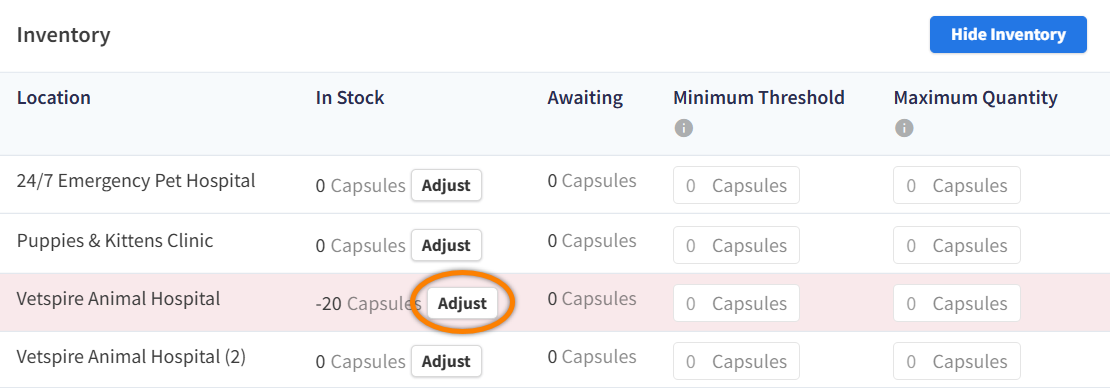
How do I adjust a negative stock quantity?
Once you have received new inventory, you can correct the stock quantity to offset the negative amount.
-
In the Inventory section of the product details, find the location with a negative stock quantity (highlighted in red).
-
Select the Adjust button, then enter the quantity received + the negative stock quantity.
Example: If your current product quantity is -5, and you have received 10 units, enter 15 in the Quantity Change field to update the stock quantity to 10.
-
Select Make Adjustment.